Showing posts with label SAP MMC. Show all posts

9/02/2017

SAP Basis Upgrade Kernel Patching

Step by step how to upgrade and patch SAP Kernel.
Kernel is an executable program that exists between SAP Applications and Operating System. It consists of executable program under the path — "/sapmnt/<SID>/exe" for UNIX and \usr\sap\SID\SYS\exe\run Windows. It starts and stops application services such as message server, dispatcher, etc.
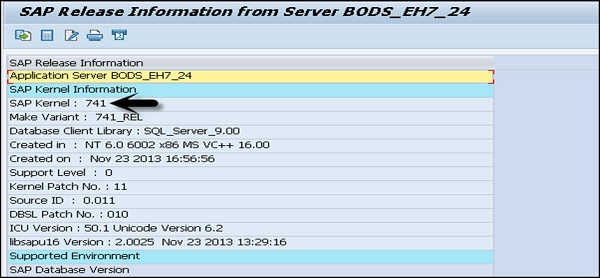
In Kernel upgrade, new .exec files replace old executable files in SAP system. To check the current version, use transaction code — SM51 > Go to Release Notes.
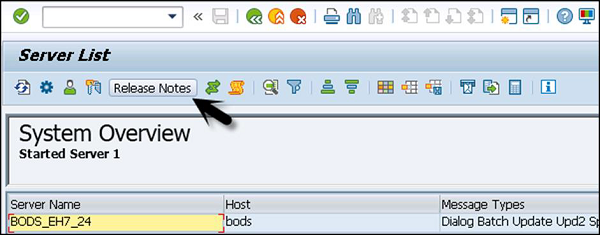
Server ListSAP Information
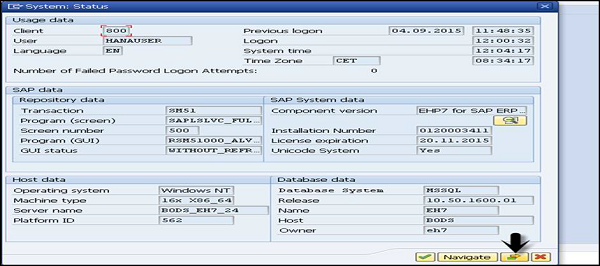
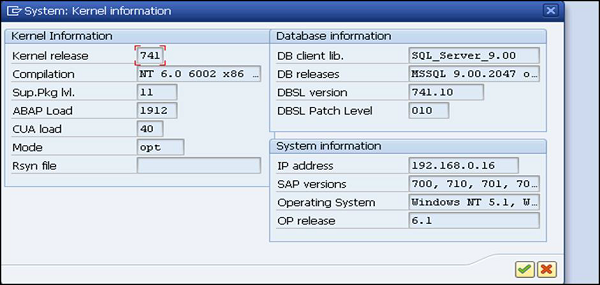
To check the status, go to System → Status tab → Other Kernel info
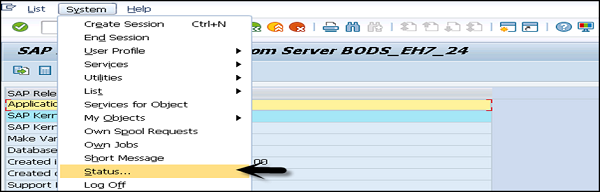
SAP StatusSystem StatusKernel Information
In UNIX, use disp+work − version to see information on the current Kernel version.
Follow these steps to download Kernel from SAP Market Place −
Step 1 − Open URL — https:\\service.sap.com and login with SID and password.
Step 2 − Go to SAP Support Portal from dropdown → Software Downloads.
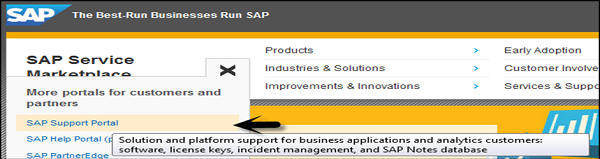
SAP BusinessesSAP Support Portal
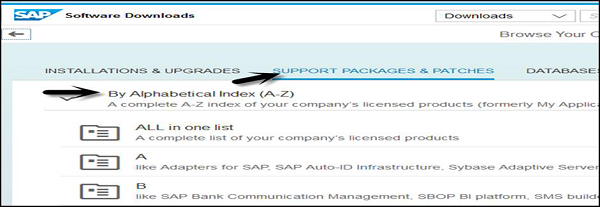
Step 3 − Go to Support Packages and patches under software downloads. Go to Software Downloads.
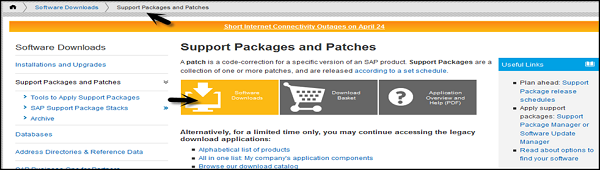
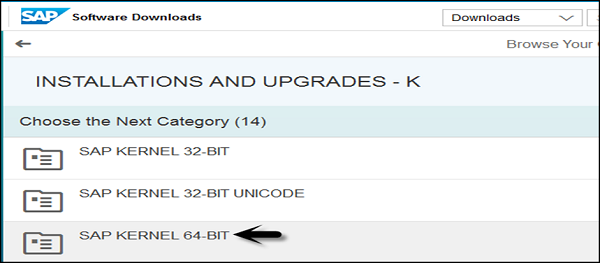
PatchesSAP Software DownloadsSAP Kernel 64-BIT
All Kernel Versions are available in 64-bit −
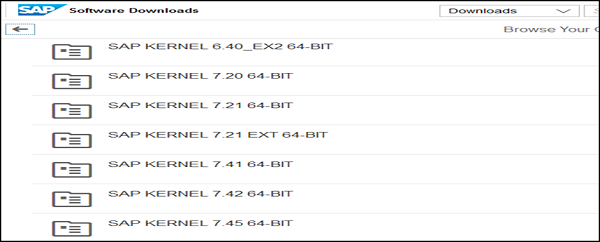
SAP Software
Step 4 − Select the Kernel version and download the files as per the Operating System – Windows, Linux, Solaris, AIX, and HP-UX.
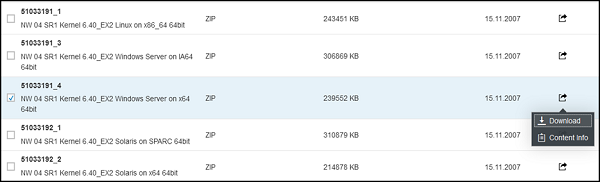
Kernel Versions

Upgrade Kernel Version

Let us now follow these steps to upgrade the Kernel version −
Step 1 − Create a directory with enough disk space and enter the name of directory.
Step 2 − Copy the upgrade files SAPEXEDB.SAR & SAPEXE.SAR files to the new directory at OS level.
Step 3 − To check directory, use 'pwd' to ensure you are in the same directory.
STep 4 − Now, uncompress .SAR files by sapcar exe.
SAPCAR –xvf sapexe.SAR
SAPCAR –xvf sapexedb.SAR

SAPCAR
Step 5 − To take backup of existing Kernel, you have to create one more directory with the name "exe_old<ddmmyy>" and take backup of existing Kernel file.
Step 6 − To perform upgrade, stop the SAP application. You don’t need to shut down the database for Kernel upgrade but you need to stop the SAP application using this command — stopsap r3.
Step 7 − Copy the files from the new kernel directory exe_new<ddmmyy → to the existing kernel directory exe.
Step 8 − Use this command to copy — cp -rp /sapmnt/<SID>/exe_new<ddmmyy>/* /sapmnt/<SID>/exe/
Step 9 − Now if you check the current Kernel version using disp+work, then check the kernel version from OS level by the command disp+work − versions and new patch version should be displayed.
Step 10 − Login to the operating system as root specific to UNIX. Execute the script in Kernel directory — ./saproot.sh <SID>
You use this to assign correct permissions to all the executable programs in the kernel such as br* file etc.
Step 11 − Start SAP Applications using this command — startsap r3.
Step 12 − If you run Transaction SM52, you can see current kernel version level.

8/24/2017

Uninstallation of SAP SMD Agent Using SWPM SP04

8/23/2017

Installation of SAP SMD diagnostics agent

Перейти к концу метаданных
In the Diagnostics Agents page, we have seen Diagnostic Agent installation related Information and all key SAP Notes having all required detail. To summarize that info I would like to introduce some steps on how to install the latest Diagnostic Agent (includes SAP Host Agent). This Diagnostic Agent is compatible with any SP level of SAP Solution manager 7.1. Also, you don't have to do a separate SAP Host Agent installation, if you have followed these steps.You can also activate the Agents On-the-fly feature with this Diagnostic Agent.

Note:  
When carrying out the below steps, make sure you have read and understood the Diagnostics Agent Installation Strategy PDF file attached with SAP Notes: 1365123  
            And sap note 1833501 for diagnostic agent installer version that is mentioned in the General Information section here: Diagnostics Agents. They explain the 
            strategy, download procedure, and installation details.
Note: These steps have been performed on MS Windows server 2003 Enterprise Edition X64 bit encoding, so in your case, the file name could be different.

Download and extract Installer media file.
To start the installation you need to first download the  Software Provisioning Manager 1.0 and their relevant kernel file. Once the correct files are downloaded have you need to unpack those.


Following these steps below you can download Kernal media file.


Once download is finished then you have to unpack these 2 files


Once you unpack those files then you have something like below ,  Once you see these files available then you are ready to launch the installation.


After launching SAPINST.EXE  you will have to select this option below to go ahead.


Here you need to select the path of Kernal file been extracted in the same folder D:\download_basket\SWPM_SP04\Krnl_7.20_WIN__IA32__IA64__x64__SP04_


Note : here on this step 2 user get created on OS level , you need to make sure on this server these users have admin level or rights
 also they should have full Read + Write + Execute access to any folder and subfolder available on this server.


Note : This part below registering to the SLD is not advisable with the newer Solution Manager system so this step could be ignored and direct do to the next step Connection of diagnostic agent with Solution Manager. 

On this step, if the user credential of target SLD system is correct then this agent get to register to the SLD. Here target SLD Could be any in your landscape usually you should connect this agent to the same SLD where your Managed system is reporting to using RZ70 or JAVA data supplier. This is an optional step but it is strongly advised to connect the agent with some SLD.


If you have SAP MMC Installed on the same server then you can see a new Instance of SMD Agent is available, should appear something like this below, from here you can start or stop agent.
 

To make sure in if the SMD Agent is connected to the SLD detail you have provided before, just logon to SLD and navigate to this below screen here you will see an agent instance is available under Diagnostic Agent Class.

See also: Uninstallation of SAP SMD Agent


SAP Solution Manager  Diagnostics Agents

Popular Posts