Showing posts with label SAP R/3. Show all posts

9/06/2017

HOUSE KEEPING / PERFORMANCE TUNING ACTIVITIES IN SAP BW SYSTEMS

In many BW Projects, we have seen Basis team and the BW consultants searching around for tracing the regular and best housekeeping options and activities provided by SAP for improving the performance of BW Production servers.
I have made an attempt to summarize and mention most of the BW House Keeping activities under a single umbrella.
Basically, I have divided the activities into 4 parts namely General monitoring, System health monitoring, Performance related monitoring and Occasional activities along with some pure basis activities in the fourth part.
Part 1 can be found here –> http://scn.sap.com/docs/DOC-46602
Part 2 can be found here –> http://scn.sap.com/docs/DOC-46844
Part 3 can be found here –> http://scn.sap.com/docs/DOC-47062
Applies to:
SAP NetWeaver Business Warehouse (formerly BI). This will also work on SAP BI 3.5 and BI 7.0.
Other popular articles from the same Author:
  1. Points to be considered while integrating BW Bex queries with BO WEBI  –> http://scn.sap.com/docs/DOC-35444
  2. SAP BW 7.3 Promising Features –>  http://scn.sap.com/docs/DOC-30461
A) Occasional Monitoring Activities:
1) Infocube Indexes:
Transaction Code –> RSA1, Manage (of Info cubes)-Performance tab
• Indexes are data structure sorted values containing pointer to records in table.
Indexes are used to improve data reading performance / query performance improvement but decreases data loading/writing performance .We delete/drop them during the data loading to data target and create again after loading finished. Its recommended to include them while designing the process chain. In process chain, before loading the data to cube use the delete index process and load the cube and create index.
• Use transaction RSRV (and RSRVALT) on a regular basis to check Infocubes. Most importantly tag ‘Database’, option ‘Database indices of an infocube and its aggregate’ to check the health of the cube.
• Using the Check Indexes button, you can check whether indexes already exist and whether these existing indexes are of the correct type (bitmap indexes).
Yellow status display: There are indexes of the wrong type
Red status display: No indexes exist, or one or more indexes are faulty
You can also list missing indexes using transaction DB02, pushbutton Missing tables and Indexes under the Diagnostics folder.
• If a lot of indexes are missing, it can be useful to run the ABAP reports SAP_UPDATE_DBDIFF and SAP_INFOCUBE_INDEXES_REPAIR.
2) Temporary tables:
• Run frequently or schedule ABAP report ‘SAP_DROP_TMPTABLES’.   
Remove temporary database objects SAP
• Run frequently or schedule ABAP report ‘RSAN_RTT_CLEAR_TEMP_TABLES’
Delete temporary tables created by analysis process
• Run frequently function module ‘RSDDS_CHANGERUN_TMPTABLS_DEL’
test function module
3) Unused database partitions:
Tools: ABAP ‘SAP_DROP_EMPTY_PARTITIONS’.
• Remove unused and empty partitions in the F- table of Infocubes using the ABAP ‘SAP_DROP_EMPTY_FPARTITIONS’. See note 430486 for further details.
Locate remove unused or empty partitions of F fact cube
4) Log files:
Tools: ABAP ‘SBAL_DELETE’, ‘RSTBPDEL’, ‘RSSM_ERRORLOG_CLEANUP’.
Remove old application logs from the Database.
• Run periodically ‘SBAL_DELETE’ to remove old application logs(see note 456150)
• Run periodically ‘RSTBPDEL’ to remove old database logs(see note 706478)
• Run periodically ‘RSSM_ERRORLOG_CLEANUP’ to remove old error logs(see note 456150)
5) Archieving:
Transaction Code  –> SARA, ABAP ‘RSEXARCA’ (See notes 643541 and 653393 for more details).
Without archieving, unused data is stored in the database and the DSO’s and Infocubes can grow unrestricted. This can lead to deterioration of general performance.
The benefits of BW archieving include:
• Enables you to archive data from InfoCubes and ODS objects and delete the archived data from the BW database. This reduces the data volume and, thus, improves upload and query performance.
• Reduction of online disk storage.
• Improvements in BW query performance.
• Increased data availability as rollup, change runs and backup times will be shorter.
• Reduced hardware consumption during loading and queries.
6) Delete PSA data:
Transaction Code –> RSA15
• Determine a retention period for data in the PSA tables. This will depend on the type of data involved and data uploading strategy. If PSA data is not deleted on a regular basis, the PSA tables go unrestricted. Very large tables increase the cost of data storage, the downtime for maintenance tasks and performance of the data load.
7) Delete change log data:
• For change logs, the deletion can be done from DSO –> Manage –> Environment –> Delete change log data.
SAP BW guide
Deleting change log data
Please note that only already updated change log requests can be deleted and after deletion a reconstruction of requests for subsequent data targets using the DSO change log will not be possible.
8) Delete DTP temporary storage:
This task is only relevant for BI 7.0/7.3.The DTP can be set up from the temporary storage in case of problems.
The deletion of temporary storage can be set from DTP maintenance –> Goto –> settings for DTP Temporary storage –>Delete temporary storage.
SAP BW blog
sap bw display data transfer process
Here you can choose for each DTP:
• For which steps you want to have a temporary storage.
• The level of detail for the temporary storage.
• The retention time of temporary storage.
9) Compression:
Transaction Code –> RSA11
• Info cubes should be compressed regularly (See notes 375132,407260,590370 for more details). Uncompressed cubes increase data volume and have negative effect on query and aggregate build performance. If too many uncompressed requests are allowed to build up in an infocube, this can eventually cause unpredictable and severe performance problems.
B) Pure Basis Activities:
SAP BW basis activities
1) Apply SAP notes / SAP service and support packs / add-on’s:
Transaction Code  –> SNOTE, SAINT, SPAM
• Implement a SAP note on demand.
• Implement SAP service packs on demand. Normal practice is that this will happen twice a year. More frequent if the BW version is rather new and the service packs comes out more frequently, lesser when the BW version is at the end of its life cycle.
• Implement BW add-ons on demand.
• To keep the system up to date, SAP recommends implementing support packages and / or patches into the system landscape on a regular basis. This should prevent already known and fixed bugs affecting your business and you can make use of product improvements. To guarantee an optimal level of support from SAP side, the system has to have an up-to-date status.
• Corrections for BW (front-end, server, plug-in or add-on) are only made available in the before mentioned support packages. With the expectation of individual cases, no description of the correction (table entries, coding) is given in the notes. In general, SAP does not carry out corrections directly in the customer system. It is recommended to apply support package stacks ,which are usually delivered quarterly.(see http://service.sap.com/sp-stacks
2) BW upgrades:
• Upgrade the BW system on demand.
3) Transport:   
Transaction Code  –> STMS
• Import transports to the system on demand.
4) Client copy activities:
Transaction Code  –> RSA13. Restore Source system.
• After a client copy of a connected source system, the connection needs to be restored.
5) Data base and Kernel settings:
Transaction Code  –> RZ10
• Reevaluate the SAP Kernel and Database settings on a yearly basis.
Related Content:
1) How to optimize Reporting Performance
2) Guide to perform efficient system copy for SAP BW Systems
3) Periodic Jobs and Tasks in BW
4) House Keeping activities for Archiving in BW systems
5) House Keeping Task List
6) BW House Keeping and BW PCA

Connect SAP Diagnostics Agent to Solution Manager using SSL

Перейти к концу метаданных
    The aim of this wiki is to help in enabling the configuration to connect the Diagnostics Agents to the Solution Manager 7.10 using SSL, as described in note 1898685. Actually, the focus is narrowed down to prerequisite #2 of step #2, described in the same note.

This configuration is not valid for Solution Manager 7.20.

Prerequisites

The prerequisites are the deployment of the IAIK libraries in the Diagnostics Agent, as described in note 1898685  and the SSL configuration for the Solution Manager Message Server and P4 ports.

Solution 

Configure transport layer security on Solution Manager JAVA Stack
The configuration of the Solution Manager Java Stack to enable secure communication is described in detail in the following guide: 
The following setup step needs to be performed to enable secure communication on the Solution Manager Java stack:
Configure SSL on AS Java:
  1. Create SSL Credentials: in the Visual Admin(/usr/sap/<SID>/DVEBMGS<xx>/j2ee/admin) of the Solution Manager, select the Key Storage, under Server > Services. Create new credentials or check the validity f the already available credentials for service_ssl:

    Detailed information and the how to guide is available under: http://help.sap.com/saphelp_nw70ehp2/helpdata/en/a6/98f73dbc570302e10000000a114084/content.htm.
  2. Assign SSL Credentials to HTTPS communication port: Access the SSL provider with the following path: Server > Services > SSL Provider. Select the configured HTTPS port (default is 5xx01) and assign the SSL certificate created in the previous step as "Server Identity".
     
  3. Assign SSL Credentials to the P4S communication port: Access P4 provider with the following path: Server > Services > SSL Provider. Select the configured P4S port (default is 5xx06) and assign the SSL certificate created in the frist sttep of this section as "Server Identity".

    Further documentation about SSL configuration for Solution Manager Java Stack is available in the following documentation:  http://help.sap.com/saphelp_nw70ehp2/helpdata/en/f1/2de3be0382df45a398d3f9fb86a36a/frameset.htm.

Configure SSL on Message Server for Solution Manager ABAP and JAVA Stack

This section is relevant if you want to use MS HTTPS and P4S connection.
The executable directory of the message server needs the SAPCRYPTO libraries installed. For a message server running as part of Central Instance of ABAP stack this is already performed in step ”Install SAP Cryptographic Library and set Profile Parameters”. For Message Server on Java Central Service Instance (SCS) and ABAP Central Service Instance (ASCS) execute the same procedure. Also make sure a valid server identity is available in $DIR_INSTANCE$/sec that a valid SAPSSLS.pse. For simplification it is possible to reuse the server identity as created for the Solution Manager ABAP Stack.
Add the following parameters to the Central Services Instance Profile to enable Message Server HTTPS port:
ms/server_port_1 = PROT=HTTPS,PORT=444$$

SAP Diagnostics Agent Maintenance Procedures

Diagnostics Agent Installations

Finding Previously Installed Diagnostics Agents

To double check, if a Diagnostics Agent is installed you should have a look at all existing / installed SAP systems that are operational at (logical) host level.
The Diagnostics Agents are in general identifiable by a System ID, as follows:
  • For agents shipped with / for SAP NetWeaver 7.1 EhP1 and higher, the Diagnostics Agent System ID is usually: DA? (DAA, DAB, etc.)
  • For agents based on older versions, the Diagnostics Agent System ID is usually: SMD

Diagnostics Agent Installer

Use the latest SWPM 1.0 Support Package (and associated Patch Level), when installing a new or an additional Diagnostics Agent. See SAP note 1833501 for the latest Diagnostics Agent Installation & Setup Guide.

SAP NetWeaver System Rename

SWPM based System Rename is not supported for the Diagnostics Agent. Instead, the below described Diagnostics Agent Replacement procedure must be used.

SAP NetWeaver System Copy

SWPM based System Copy is not supported and not relevant for the Diagnostics Agent. Instead, perform a fresh Diagnostics Agent installation on the target system.

Have Up-To-Date SAP Host Agents

Checking the SAP Host Agent Version

  • Solution Manager 7.1 currently requires having at least SAP Host Agents 7.20 SP147 in the Managed system landscape.
  • However, when using Solution Manager 7.1 SP10 or higher and Agents On-the-fly, deploy SAP Host Agents 7.20 SP163, at least on High Available/Fail-Over hosts. With this version, the logical hostname switches are detected faster.
  • Consider using the SAP Host Agents 7.20 SP179, in case you encounter errors related to the connectivity with the SAP Host Agent. See also: SAP Host Agent troubleshooting.
  • Further below you find more details, including hints to find out the version of existing SAP Host Agents or how to upgrade a SAP Host Agent.

Installing SAP Host Agent

  • Install one SAP Host Agent, per physical host, if not yet installed. See SAP note 1031096.

Upgrading SAP Host Agent

  • Upgrading the SAP Host Agent according to SAP note 1031096, if the version is not sufficient
    • Check the version at OS level (search in the output for "SAPHOSTAGENT information"):
      • For Windows: "%ProgramFiles%"\SAP\hostctrl\exe\saphostctrl -function ExecuteOperation -name versioninfo
      • For Unix: /usr/sap/hostctrl/exe/saphostctrl -function ExecuteOperation -name versioninfo
    • The currently installed SAP Host Agent version is also visible under the host details, if “Managed System Configuration” has been performed with solman_setup
      • Navigate to Solution Manager Administration work center → Landscape → Hosts → <search for your host> → Host Operations → <expand "More Details" section> → Status
  • Implement automatic upgrade process (especially if you plan SAP Host Agent related changes)
    • SAP note 1473974 describes ways to centrally and automatically upgrade running SAP Host Agents

Diagnostics Agent Upgrade

  • There is no need to upgrade Diagnostics Agents (business logic) explicitly.
  • Diagnostics Agents update their business logic (coding) from the SAP Solution Manager system to which they are connected. All connected Diagnostics Agents that are running in the landscape, are centrally patched, when deploying an LM-SERVICE Java Software Component Archive (SCA) on the SAP Solution Manager system.
    • Diagnostics Agents installed with Software Provisioning Manager 1.0 SP3, SP4, SP5 and SP6, initially have a version like 7.10.8.xxxxxx
    • When connecting to a SAP Solution Manager system 7.10 SP5, the freshly installed agent will downgrade to a version like 7.10.5.xxxxxx
    • When connecting to a SAP Solution Manager system 7.10 SP10, the freshly installed agent will upgrade to a version like 7.10.10.xxxxxx
  • Diagnostics Agent installation SAP notes document procedures to resolve known issues. Alternatively, you can use the below Diagnostics Agent Replacement procedure.
SAP Solution Manager 7.2:
  • Diagnostics Agents which were previously connected against a SAP Solution Manager 7.1 system, and which have been migrated/reconnected to a SAP Solution Manager 7.2 system, will also automatically update their business logic (coding) from the SAP Solution Manager system to which they are connected.
 Diagnostics Agent Kernel Patch
If you have problems with the SAP Kernel which is used by the Diagostics Agent, you may need to apply a SAP Kernel patch for the Diagnostics Agent. The procedure for Linux/Unix and for Windows is described in SAP note 2147092.

Diagnostics Agent Kernel Upgrade

In rare cases, you may be asked to upgrade the SAP Kernel used by the Diagnostics Agent (see SAP note 1707141).
The same can be achieved, by applying the below Diagnostics Agent Replacement procedure.

Diagnostics Agent JVM Upgrade

In rare cases, you may be asked to upgrade the SAP JVM used by the Diagnostics Agent (see SAP note 1774669).
The same can be achieved, by applying the below Diagnostics Agent Replacement procedure.

Diagnostics Agent Replacement

To replace a Diagnostics Agent, install a new Diagnostics Agent, and uninstall the previous Diagnostics Agent. This procedure can be relevant in the following scenarios:
  • Replace a Diagnostics Agent, which has problems that cannot be easily resolved.
  • “Upgrade” a Diagnostics Agent system, e.g.
    • install a new Diagnostics Agent using a newer installer and a newer kernel, and get a Diagnostics Agent that has a new SAP JVM and a new SAP Kernel.
    • uninstall the previous Diagnostics Agent
Follow the following procedure:
  • Reset server name
    • Login to the SAP Solution Manager system to which the agent to be replaced is connected
    • Navigate to the Agent Administration and note the server name of the previous Diagnostics Agent
    • Reset the server name using the context menu of the Diagnostics Agent
    • Stop the Diagnostics Agent
  • Install new Diagnostics Agent using a different SID
  • Assign the same server name to the new Diagnostics Agent, using the smdsetup script.
    • For smdsetup script usage, see the latest Diagnostics Agent Installation & Setup Guide, accessible via SAP note 1833501.
    • Java based Managed Systems require important additional actions(see next section)
  • Uninstall the previous Diagnostics Agent using SWPM.
This procedure will:
  • Provide you with a newly installed Diagnostics Agent
  • The Diagnostics Agent SAP Kernel will have been upgraded to the version that you have provided
  • The Diagnostics Agent SAP JVM will have been upgraded to the version that you have provided via the SAP Kernel media
  • The SAP Host Agent on your system will have been upgraded to a more recent version if a more recent version was provided via the SAP Kernel media

Diagnostics Agent Replacement in the context of a Java Managed System

This procedure updates the Managed System JVM parameters so that the Introscope Byte Code Adapter binaries are no longer taken from the previous Diagnostics Agent directory structure.
  • In case the “Deploy Byte Code Adapter under Managed System Instance(s)” option was not used in the past (before 7.1 SP12 this option was called "Ensure HA virtualization compatibility"):
      • Again configure the Wily Introscope Agent (Byte Code Adapter Installation) via transaction solman_setup → Managed System Configuration → Configure Automatically
          • Pre-requisite since Solution Manager 7.1 SP05:
              • Additionally, mark the option "Deploy Byte Code Adapter under Managed System Instance(s)" within step "Enter System Parameters". SAP recommends providing a relative path name like ByteCodeAdapter for the "Introscope BC Adapter deployment path" field, in order to locate the Byte Code Adapter binaries and configuration files inside the Managed system directory structure (/usr/sap/<ManagedSID>/<InstanceID>).
              • The Diagnostics Agent OS user must have write permissions for this Managed System path location. For details see SAP note 1163751.
      • Restart the Java Managed System
If you experience problems with the Byte Code Adapter (Managed System does not restart), please check Introscope Troubleshooting (search for "uninstall").

Diagnostics Agent Removal

To remove a Diagnostics Agent instance installed for a specific host name:
  • In case the solman_setup “Deploy Byte Code Adapter under Managed System Instance(s)” option was used in the past to set up the Byte Code Adapter of the Java Managed System(s) running on the host (before 7.1 SP12 this option was called "Ensure HA virtualization compatibility"):
      • Optionally: Also uninstall the Byte Code Adapter by removing the JVM parameters listed in the relevant Instroscope Setup Guide from Introscope Home → Documentation.
  • Else, take the following actions (in case the solman_setup “Deploy Byte Code Adapter under Managed System Instance(s)” option was not used in the past during the Managed System Configuration):
      • IMPORTANT: Remove the JVM parameters used to start/run the Introscope Byte Code Adapter from the Java Managed System. These parameters listed in the relevant Instroscope Setup Guide from Introscope Home → Documentation.
      • NOTE: The Managed System JVM parameters (to be removed) show that the Introscope Byte Code Adapter executed by the Java Managed System uses files from the Diagnostics Agent directory structure, e.g.:
          • Xbootclasspath/p:D:/usr/sap/DAA/SMDA98/SMDAgent/applications.config/com.sap.smd.agent.application.wily/BytecodeAgent/ISAGENT.xxxxxxxxxx/wily/connectors/AutoProbeConnector.jar; D:/usr/sap/DAA/SMDA98/SMDAgent/applications.config/com.sap.smd.agent.application.wily/BytecodeAgent/ISAGENT.xxxxxxxxxx/wily/Agent.jar 
      • Restart the Java Managed system to no longer run the Introscope Byte Code Agent.
  • Run the Diagnostics Agent installer SWPM, to uninstall the Diagnostics Agent
If you experience problems with the Byte Code Adapter (Managed System does not restart), please check Introscope Troubleshooting (search for "uninstall").
After the Diagnostics Agent has been uninstalled, apply the option "Delete Offline Agent Entry" in the Agent Administration.

8/24/2017

Uninstallation of SAP SMD Agent Using SWPM SP04

8/23/2017

SAP R/3 Application server installation on Linux

In this article, I will give you step by step for installation of application server system SAP R / 3 using the Linux OS. Why use Linux? Instead better use Windows? There are some things that a consideration to me why using Linux include:

  1. Database Instance that will be used is Oracle with a platform AIX (IBM's proprietary UNIX). Between AIXand Linux, UNIX machines are equally so compatibility will be more awake than using Windows.
  2. Linux is free and open source. By nature, I was much easier to perform tuning and search for references
  3.  on the Internet.
  4. Communication between Linux and AIX will use NFS, while Windows and AIX will use SAMBA.
  5. Linux machine is more stable, reliable, and most importantly the virus-immune.
  6. Linux is also less expensive in terms of maintenance, hardware requirements, compared to using
  7.  Windows (must have a license) and AIX (in terms of licensing and hardware).
  8. Selection of Linux distributions that will be used freely. I prefer the distro that can use the concept of LVM (Logical Volume Management) so I can make a logical volume space maintenance easier. I will try to explain using Redhat machine. I personally have tried to use SuSE as well. The main difference between them is the problem of the default file system used. Redhat uses ext3, while SuSE using reiserfs.

Excellence ext3 and reiserfs is the ability to manage the logical volume size online.So we can easily increase the size of logical volumes without having to unmount the logical volume.We start, yes ...
1. OS InstallationWhen the OS installation, prepare a sufficient partition for the installation of SAP. The table on the following attachment (Disk) The following will give an explanation setting partitions using LVM.
2. Installing the Central InstanceSince we will use an existing Database Instance on AIX 64 bit machine, then we have to install the Central Instance. Installing the Central Instance package in Linux is to get the executable files from the SAP kernel for Linux.Set environment needed to run sapinst among others:LD_LIBRARY_PATH = / sapmnt / [SID] / exeSAPINST_JRE_HOME = / opt / [location of java runtime environment]DISPLAY = [IP_Address of Windows Client]: 0.0umask = 22
To test, run the xclock command on the console. If an analog clock image, it means that environment is set correctly. If not appear, review the value of each environment variable you.

Go to the directory sapinst. Sapinst Run command on the console.

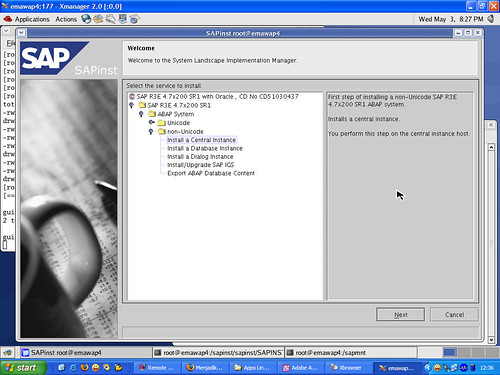
Choose Install Central Instance.

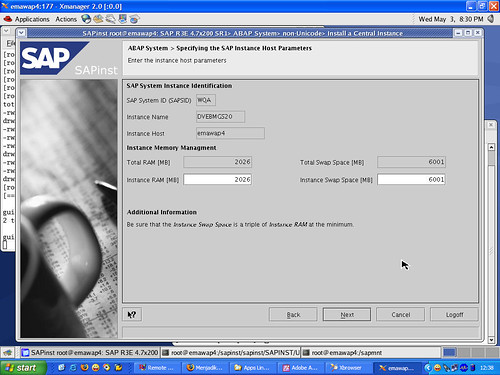
Fill in the information to the SAP System ID (SAPSID) and Instance Number.Customize with existing information on the Database Instance on AIX.

Fill in the information database ID (DBSID) and Database Host.

Let the information by default. This we do because this server will only be used asapplication servers.

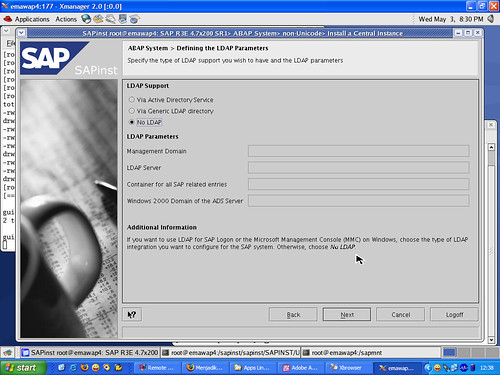
Choose No if you do not use LDAP LDAP facilities on your network.

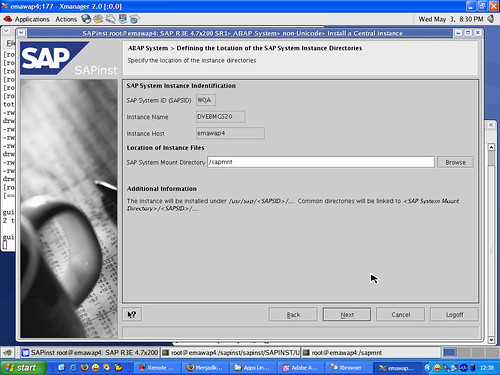
Make sure that this directory is exist.

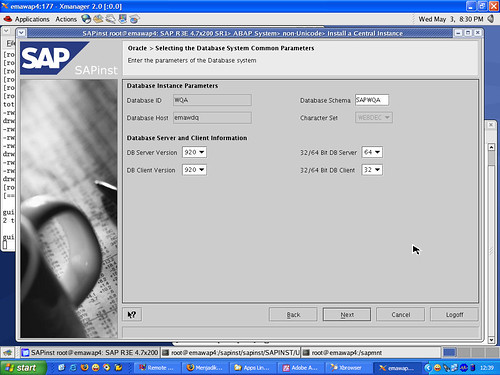
Make sure the correct information Database Schema. And do not forget the type ofdatabase server is running on AIX is 64 bits.

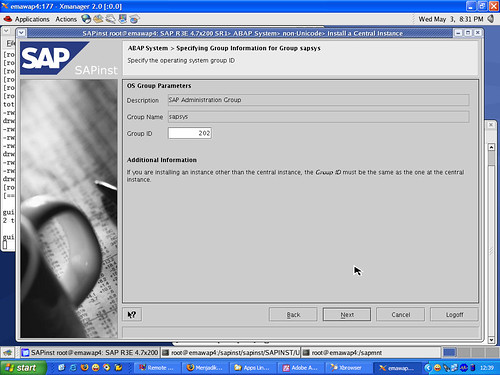
Information about the group sapsys. Noteworthy is the Group ID must match the Group ID on the AIX machine (as a database server).

Information about the group dba. Noteworthy is the Group ID must match the Group IDon the AIX machine (as a database server).

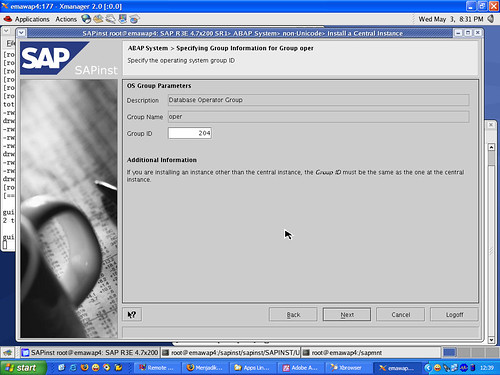
Information about the group shift gears. Noteworthy is the Group ID must match the Group ID on the AIX machine (as a database server).

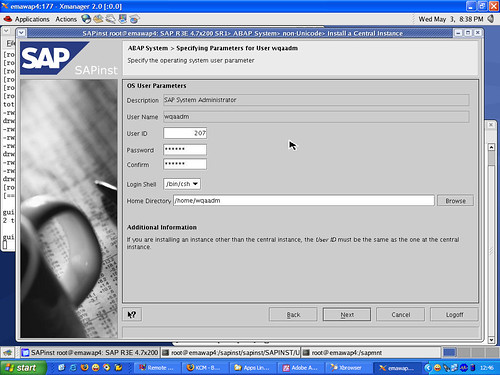
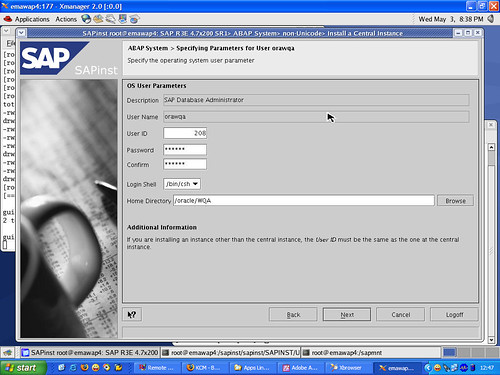
Information about the user [sid] adm. Must be considered is the User ID andpassword must be the same as your User ID and password on AIX machine.

Information about the user ora [sid]. Must be considered is the User ID and passwordmust be the same as your User ID and password on AIX machines.

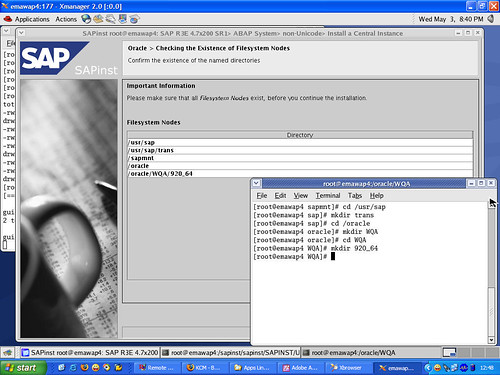
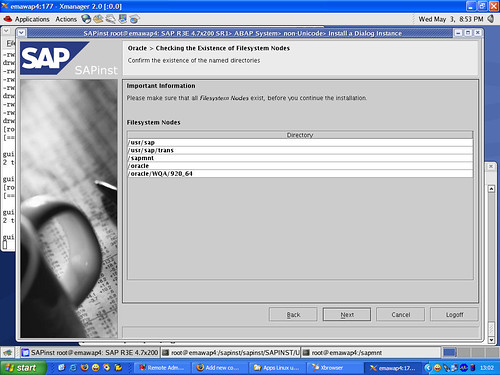
Note the directory listing above. These directories must exist. If not exist, create itnow!. The directory must exist is / usr / sap, / usr / sap / trans, / sapmnt, / oracle, /oracle / [SID] / 920_64.

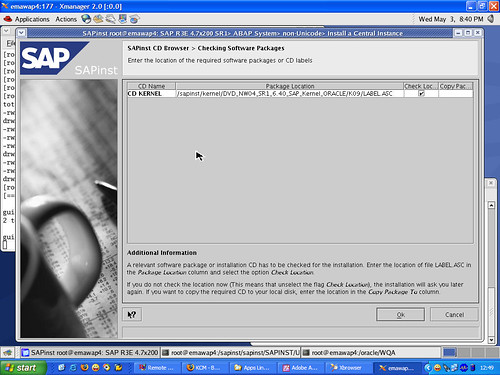
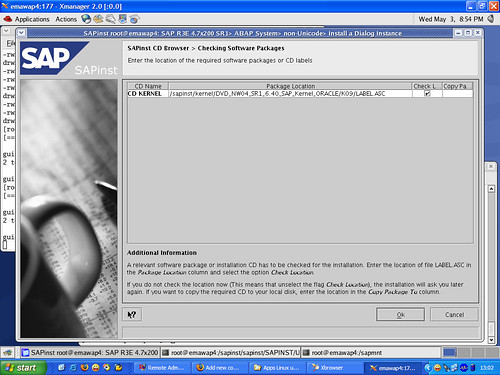
You must indicate the location of the SAP Kernel for Linux is available. You should be ready.

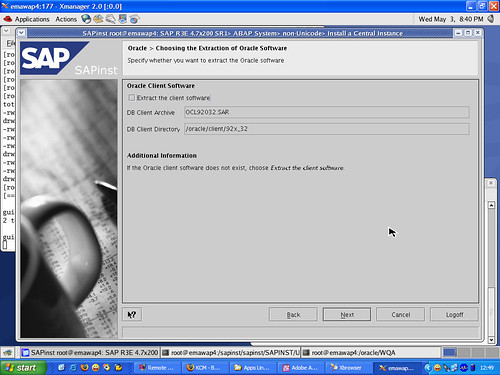
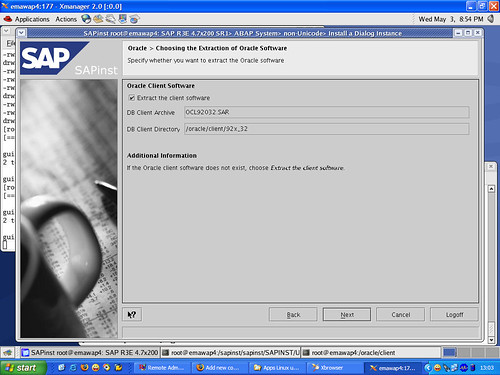
Information extraction of Oracle Client. Remove the check mark. We will not installOracle Client now.

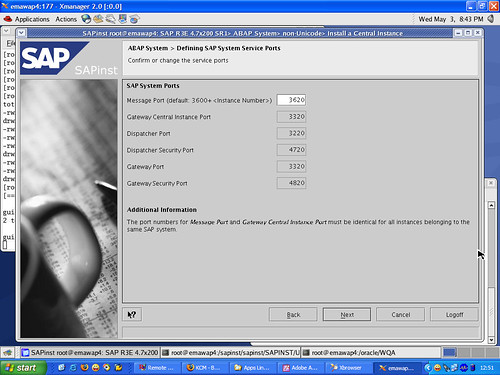
Information on ports used by SAP applications. The following ports should not beused by other applications, which is 36 [system number], 33 [system number], 32[system number], 47 [system number], and 48 [system number]. Please edit the file /etc / services.

Information listener name and port used by the listener. Make sure the port is not usedby other applications.

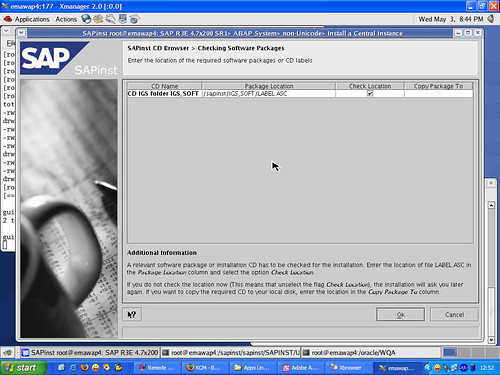
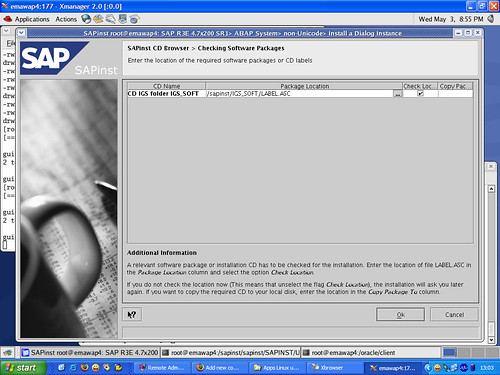
Show location IGS_SOFT.

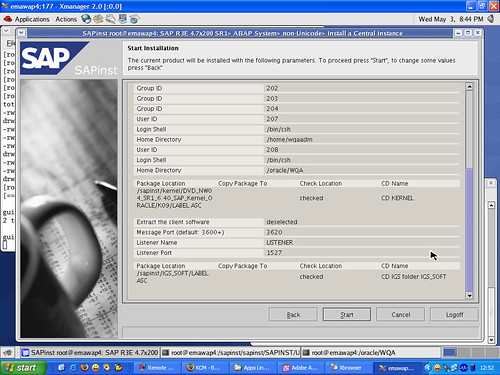
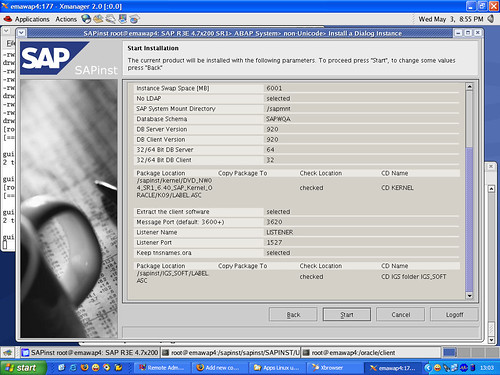
Summary information on the Central Instance installation. Check back and you stillcan click the back button if there is not yet appropriate.

Installing the central instance is running.

Congratulations!! Installing the central instance successfully. We're already in half way.Please break before ... enjoy hot coffee and fried bananas you ...:)
3. Installing Dialog Instance
Set environment needed to run sapinst among others:
LD_LIBRARY_PATH = / sapmnt / [SID] / exeSAPINST_JRE_HOME = / opt / [location of java runtime environment]DISPLAY = [IP_Address of Windows Client]: 0.0umask = 22
To test, run the xclock command on the console. If an analog clock image, it means that environment is set correctly. If not appear, review the value of each environment variable you.Make sure the machine Linux and AIX machines know each other. Perform the addition of the IP Address and hostname Linux on AIX machines and vice versa.
From the AIX machine via NFS, shared directory / sapmnt / [SID] / global and /sapmnt / [SID] / profile. From the Linux machine, mount the directory with the samemount point.

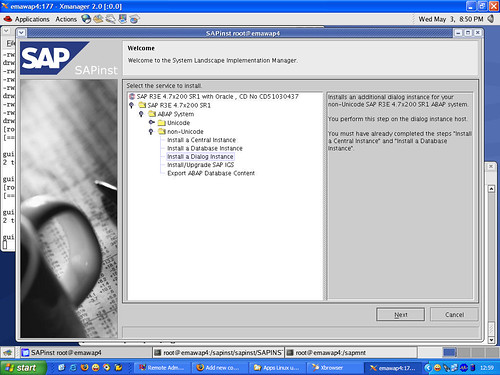
Screen installation election. Select Non-Unicode_Install Dialog Instance.
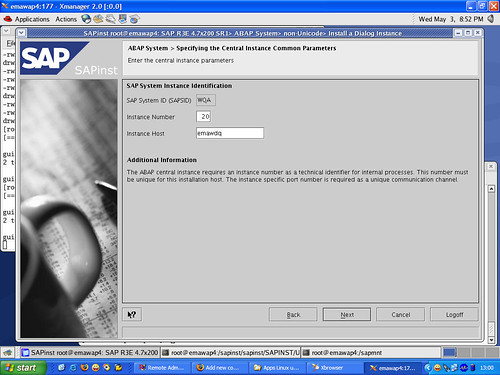
Information about the Central Instance. Remember! instance number and instanceinformation are hosted on the AIX machine.

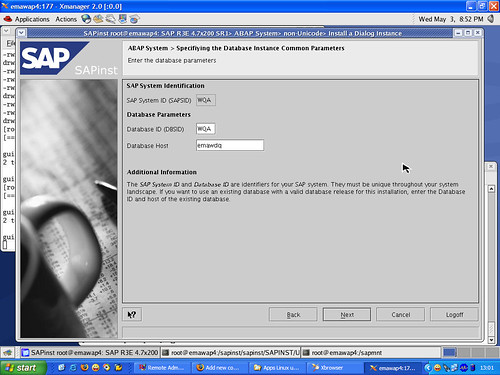
Information Database ID (DBSID) and Database Host.

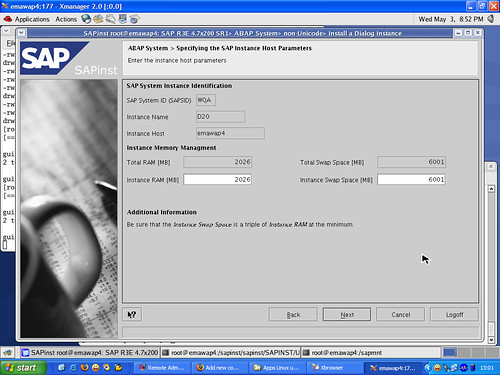
Information hosted instance of parameters. Leave the default.

Choose No if you do not use LDAP LDAP on the network.

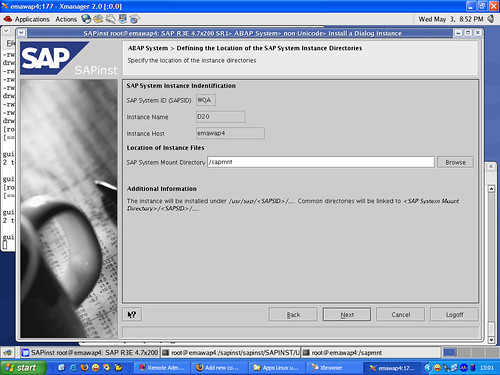
Location SAP Mount Directory is on / sapmnt. Make sure this directory exists.

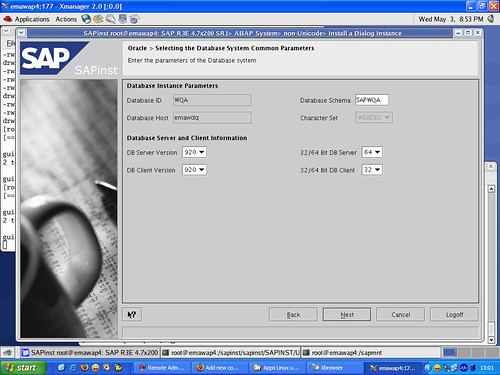
Note the type of information Database Schema and Database servers. Do not forgetthat the database server that we use is 64 bits.

Note the directory listing above. These directories must exist. If not exist, create itnow!. The directory must exist is / usr / sap, / usr / sap / trans, / sapmnt, / oracle, /oracle / [SID] / 920_64.

You must indicate the location of the SAP Kernel for Linux is available. You should be ready.

Now is the time for us to install Oracle Client. Tick ​​the option extract oracle client.

Information used ports in the SAP. Should have been prepared at the time ofinstallation of the Central Instance.

Setting name of the listener and the listener port name.

Location IGS_SOFT.

Installation Summary Dialog Instance.
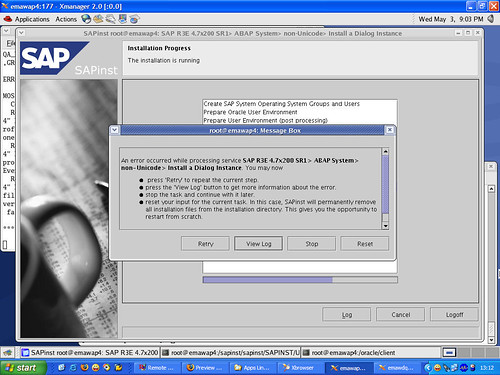
Installing Dialog Instance is running.

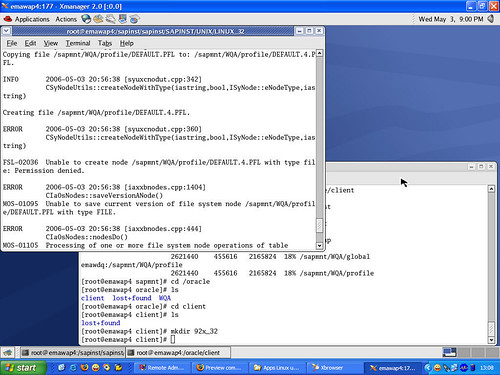
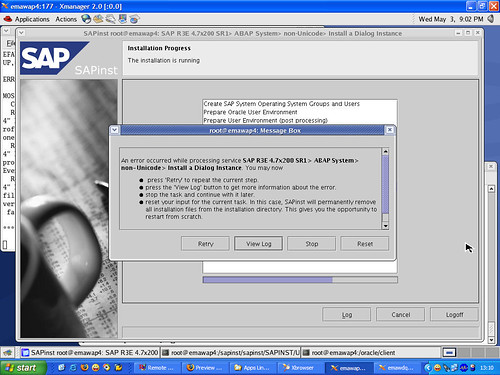
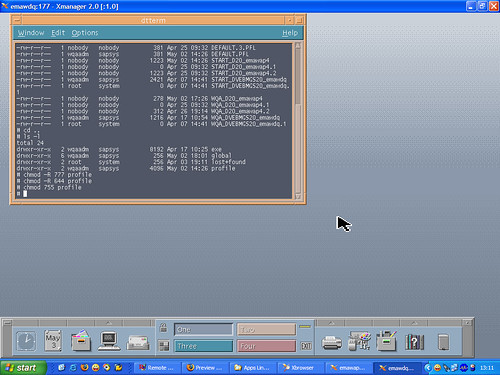
Error will be out due to lack of permissions on the directory NFS / sapmnt / [SID] /profile.

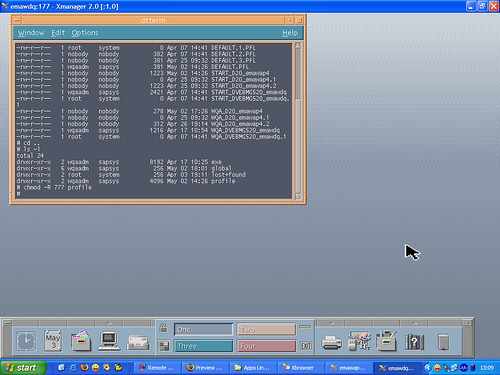
From the AIX machine, change the first permissions recursively to 777, the command# chmod-R / sapmnt / [SID] / profile. Continue the installation until it met the error again.

Errors occur because the permissions on the directory NFS / sapmnt / [SID] / profileon AIX machines.

Restore permissions to its original position. Use the following commands in succession: # chmod-R 644 profile, # chmod 755 profile.

This error is a bug from SAP. Please edit the file keybd.xml. Search keyword"ERROR" and change it to OK. Save, then run back to the old installation.

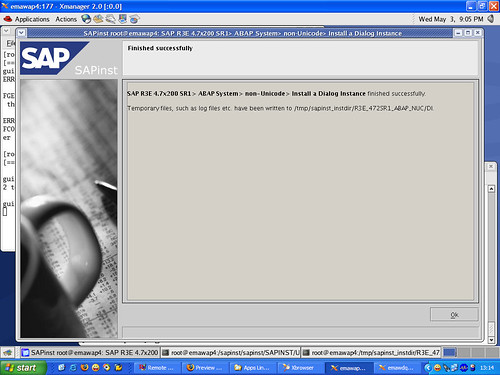
Congratulations! Dialog Instance installation has been completed.
4. Next run the dialog instance. Previous sure central instance and database server is running on the AIX machine.
Now we already have a Linux application servers are cheap, reliable and stable.There is more to be tuning, later we went on again.

Popular Posts