Basically, I have divided the activities into 4 parts namely General monitoring, System health monitoring, Performance related monitoring and Occasional activities along with some pure basis activities in the fourth part.
Part 1 can be found here –> http://scn.sap.com/docs/DOC-46602
Part 2 can be found here –> http://scn.sap.com/docs/DOC-46844
Part 3 can be found here –> http://scn.sap.com/docs/DOC-47062
Applies to:
SAP NetWeaver Business Warehouse (formerly BI). This will also work on SAP BI 3.5 and BI 7.0.
Other popular articles from the same Author:
- Points to be considered while integrating BW Bex queries with BO WEBI –> http://scn.sap.com/docs/DOC-35444
- SAP BW 7.3 Promising Features –> http://scn.sap.com/docs/DOC-30461
A) Occasional Monitoring Activities:
1) Infocube Indexes:
Transaction Code –> RSA1, Manage (of Info cubes)-Performance tab
• Indexes are data structure sorted values containing pointer to records in table.
Indexes are used to improve data reading performance / query performance improvement but decreases data loading/writing performance .We delete/drop them during the data loading to data target and create again after loading finished. Its recommended to include them while designing the process chain. In process chain, before loading the data to cube use the delete index process and load the cube and create index.
• Use transaction RSRV (and RSRVALT) on a regular basis to check Infocubes. Most importantly tag ‘Database’, option ‘Database indices of an infocube and its aggregate’ to check the health of the cube.
• Using the Check Indexes button, you can check whether indexes already exist and whether these existing indexes are of the correct type (bitmap indexes).
Yellow status display: There are indexes of the wrong type
Red status display: No indexes exist, or one or more indexes are faulty
You can also list missing indexes using transaction DB02, pushbutton Missing tables and Indexes under the Diagnostics folder.
• If a lot of indexes are missing, it can be useful to run the ABAP reports SAP_UPDATE_DBDIFF and SAP_INFOCUBE_INDEXES_REPAIR.
2) Temporary tables:
• Run frequently or schedule ABAP report ‘SAP_DROP_TMPTABLES’.

• Run frequently or schedule ABAP report ‘RSAN_RTT_CLEAR_TEMP_TABLES’

• Run frequently function module ‘RSDDS_CHANGERUN_TMPTABLS_DEL’

3) Unused database partitions:
Tools: ABAP ‘SAP_DROP_EMPTY_PARTITIONS’.
• Remove unused and empty partitions in the F- table of Infocubes using the ABAP ‘SAP_DROP_EMPTY_FPARTITIONS’. See note 430486 for further details.

4) Log files:
Tools: ABAP ‘SBAL_DELETE’, ‘RSTBPDEL’, ‘RSSM_ERRORLOG_CLEANUP’.
Remove old application logs from the Database.
• Run periodically ‘SBAL_DELETE’ to remove old application logs(see note 456150)
• Run periodically ‘RSTBPDEL’ to remove old database logs(see note 706478)
• Run periodically ‘RSSM_ERRORLOG_CLEANUP’ to remove old error logs(see note 456150)
5) Archieving:
Transaction Code –> SARA, ABAP ‘RSEXARCA’ (See notes 643541 and 653393 for more details).
Without archieving, unused data is stored in the database and the DSO’s and Infocubes can grow unrestricted. This can lead to deterioration of general performance.
The benefits of BW archieving include:
• Enables you to archive data from InfoCubes and ODS objects and delete the archived data from the BW database. This reduces the data volume and, thus, improves upload and query performance.
• Reduction of online disk storage.
• Improvements in BW query performance.
• Increased data availability as rollup, change runs and backup times will be shorter.
• Reduced hardware consumption during loading and queries.
6) Delete PSA data:
Transaction Code –> RSA15
• Determine a retention period for data in the PSA tables. This will depend on the type of data involved and data uploading strategy. If PSA data is not deleted on a regular basis, the PSA tables go unrestricted. Very large tables increase the cost of data storage, the downtime for maintenance tasks and performance of the data load.
7) Delete change log data:
• For change logs, the deletion can be done from DSO –> Manage –> Environment –> Delete change log data.


Please note that only already updated change log requests can be deleted and after deletion a reconstruction of requests for subsequent data targets using the DSO change log will not be possible.
8) Delete DTP temporary storage:
This task is only relevant for BI 7.0/7.3.The DTP can be set up from the temporary storage in case of problems.
The deletion of temporary storage can be set from DTP maintenance –> Goto –> settings for DTP Temporary storage –>Delete temporary storage.


Here you can choose for each DTP:
• For which steps you want to have a temporary storage.
• The level of detail for the temporary storage.
• The retention time of temporary storage.
9) Compression:
Transaction Code –> RSA11
• Info cubes should be compressed regularly (See notes 375132,407260,590370 for more details). Uncompressed cubes increase data volume and have negative effect on query and aggregate build performance. If too many uncompressed requests are allowed to build up in an infocube, this can eventually cause unpredictable and severe performance problems.
B) Pure Basis Activities:

1) Apply SAP notes / SAP service and support packs / add-on’s:
Transaction Code –> SNOTE, SAINT, SPAM
• Implement a SAP note on demand.
• Implement SAP service packs on demand. Normal practice is that this will happen twice a year. More frequent if the BW version is rather new and the service packs comes out more frequently, lesser when the BW version is at the end of its life cycle.
• Implement BW add-ons on demand.
• To keep the system up to date, SAP recommends implementing support packages and / or patches into the system landscape on a regular basis. This should prevent already known and fixed bugs affecting your business and you can make use of product improvements. To guarantee an optimal level of support from SAP side, the system has to have an up-to-date status.
• Corrections for BW (front-end, server, plug-in or add-on) are only made available in the before mentioned support packages. With the expectation of individual cases, no description of the correction (table entries, coding) is given in the notes. In general, SAP does not carry out corrections directly in the customer system. It is recommended to apply support package stacks ,which are usually delivered quarterly.(see http://service.sap.com/sp-stacks)
2) BW upgrades:
• Upgrade the BW system on demand.
• Upgrade the BW system on demand.
3) Transport:
Transaction Code –> STMS
• Import transports to the system on demand.
Transaction Code –> STMS
• Import transports to the system on demand.
4) Client copy activities:
Transaction Code –> RSA13. Restore Source system.
• After a client copy of a connected source system, the connection needs to be restored.
Transaction Code –> RSA13. Restore Source system.
• After a client copy of a connected source system, the connection needs to be restored.
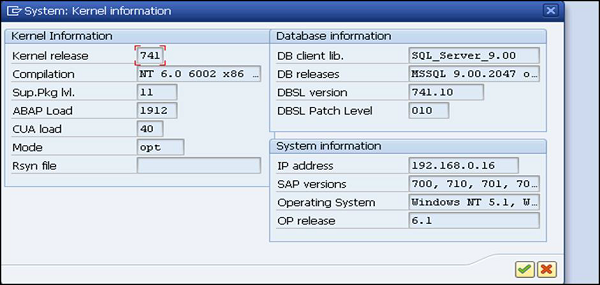
5) Data base and Kernel settings:
Transaction Code –> RZ10
• Reevaluate the SAP Kernel and Database settings on a yearly basis.
Transaction Code –> RZ10
• Reevaluate the SAP Kernel and Database settings on a yearly basis.
Related Content:
1) How to optimize Reporting Performance
http://scn.sap.com/community/business-explorer/blog/2013/07/25/how-to-optimize-reporting-performance
2) Guide to perform efficient system copy for SAP BW Systems
3) Periodic Jobs and Tasks in BW
4) House Keeping activities for Archiving in BW systems
5) House Keeping Task List
6) BW House Keeping and BW PCA